Tomato Planting


 Date:  May 21, 2013


What I used to notch my garden so that I would have my square-foot grid:  Twine, tape measurerer, pencil, and a big saw


You can see how the plants started to bend up toward the sun


Dug two trenches - pretty deep because my plants are so leggy


Nice and deep!

What I used to dig

Nutrients I added to the trenches:  leaves, bananas, and eggshells

Egg shells:  adds calcium - hope this helps with bottom end rot (BER).  I got it last year and it's due to lack of calcium

Bananas:  adds potasium

Leaves - adds carbon

Put all the ingredients together plus added some of my compost - these plants should be happy :)

How I placed my plants

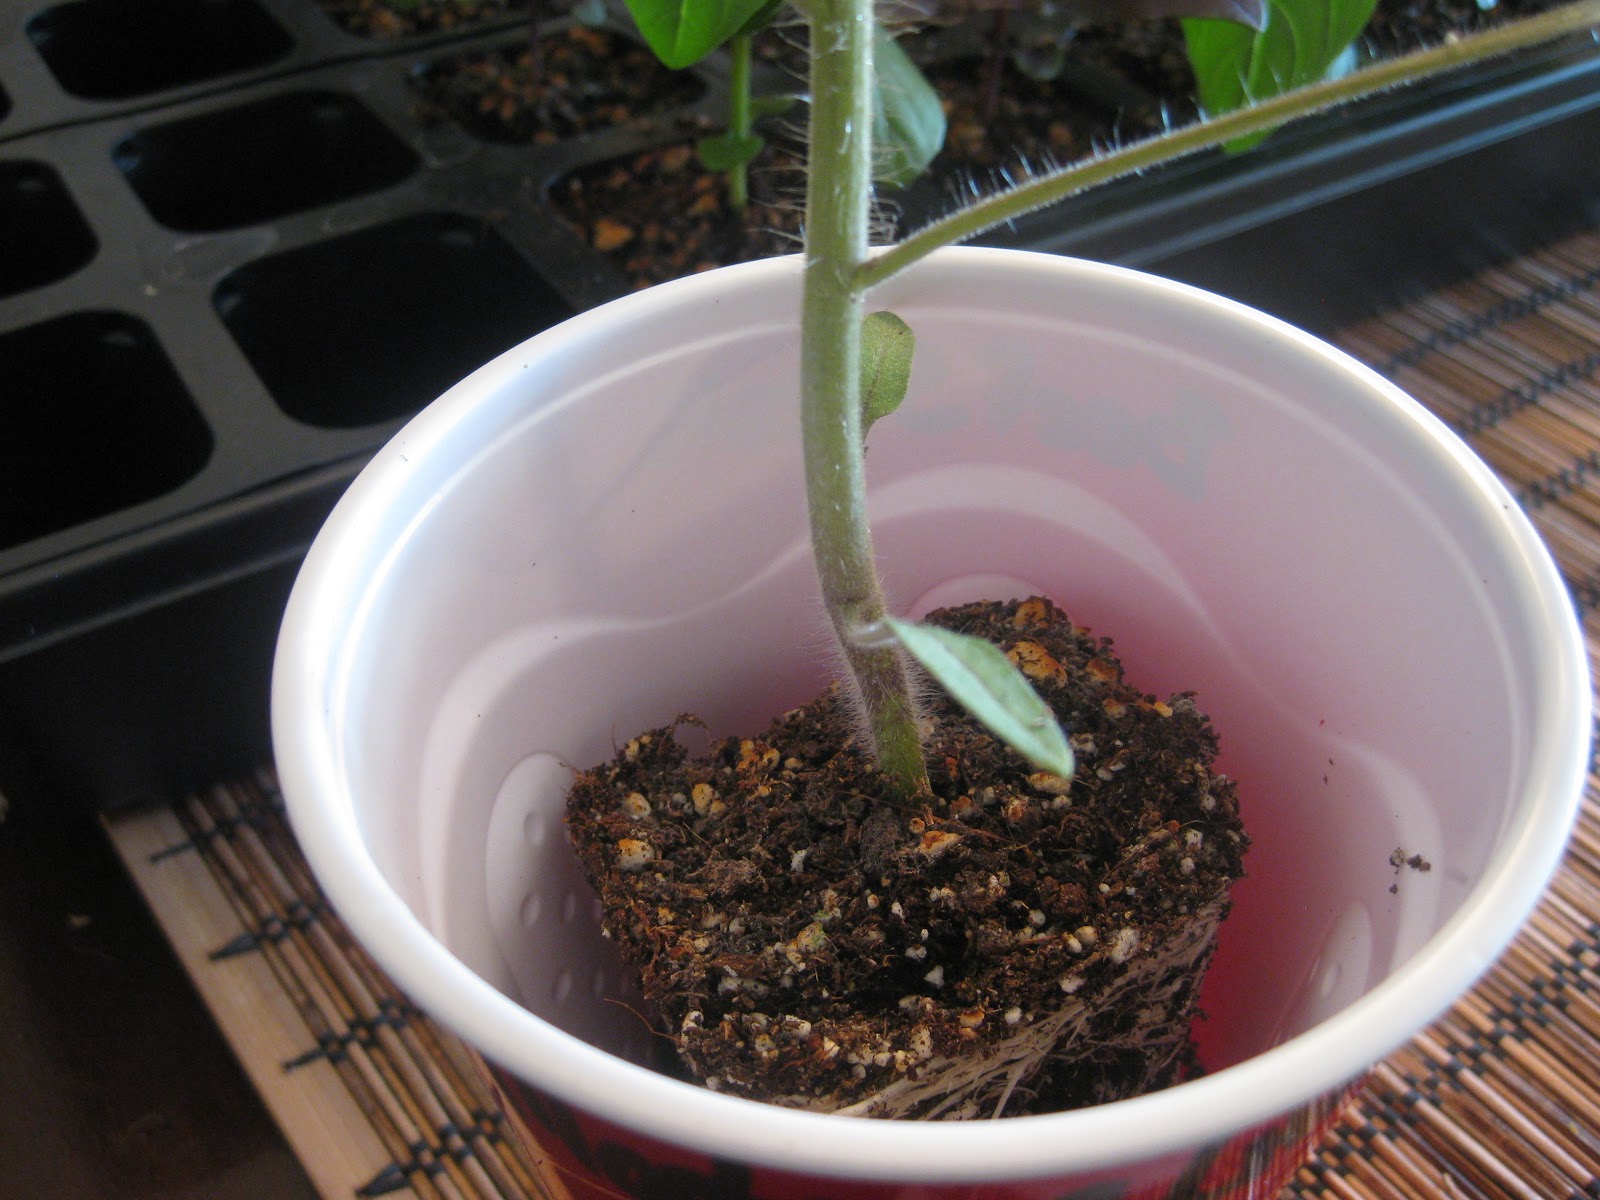
Close up - you can see how the roots are in front of the plant

Here's where things went bad - while I had my plants lieing on their sides so they could reach upwards, we had a really hard rain storm that beat the tops of several of my plants off.  Note to self:  Check the rain forecast prior to setting your plants on their sides!....lesson learned.

Poor, poor baby

All planted

Remember all the roots are in front so these plants were bent into an upright position.  After a few days, they should naturally straighten out.


This Started off as a Good Idea...

May 19, 2013

Since my plants are so leggy I'm going to trench them.  Trenching is when you plant them on their sides then bend the top of the plant up...pretty close to a 90 degree angle.
I'm afraid of snapping their little leggy necks so I'm trying something out I saw on You Tube.


You lay your tomato plants on their side for a couple of days.  What happens is they naturally want to reach up toward the sun.  By the plants doing this, they are creating their bend.  This makes it so I'm not forcing them to be upright when I plant them on their sides.


View looking at the tops.  Just remember how these look to compare to the next update.


This is my tomato bed.  As you can tell, it doesn't have all of it's dirt yet.


Hardening Off Time

May 10, 2013

Hardening off your plants is probably the worst part about growing your own plants. At least for me it is. My plants are in the basement and I have to carefully carry the trays upstairs then outside and the plants ALWAYS tip over. (That's the negative of using red Solo cups).

I started off putting the plants in the shade until they started to wilt. I did this for several days. Then I gave them morning sun until they wilted then placed them back under the lights. Once they perked up, I placed them in the shade. I did that for 3 or 4 days. Then I started just leaving them outside all day then giving them breaks in the shade if they started to wilt. It wasn't long before they could sit in the sun all day with no ill effects.

This tray has a mixture of sweet basil, purple basil, peppers, and bok choy


Here are my tomatoes - pretty leggy. Lesson learned - I'm pretty sure I kept them on the heat mat too long so they grew taller than they should. Last year I removed the heat mat as soon as they all germinated but this year I was babying them and used it for several weeks longer.


Already starting to grow flowers :)


Pepper plants are growing buds


My beautiful pepper plants. I'm very happy with how these turned out.


My celery stalk - I'm amazed how big this is considering how tiny the seed is and how hard it was to germinate.


Celery shot from above - you can see the new growth coming up.


Close up of an eggplant leaf. You can see the tiny pricklies.


Another eggplant picture


Eggplant in the back right, celery in the front right, then basil, and bok choy


The bottom basil leaves are getting ridiculous!


The purple basil is really pretty.


Update

April 28, 2013

Front two plants are my eggplants after being transplanted into larger containers.

You can see my dead cabbage that I'm trying to revive and my celery in the top-right container.


New Grow Shelving - Tomato and Pepper Update

April 28, 2013

Got this new rack for my plants.  I like that the shelves aren't solid.  It seems as if more light is getting to the plants.  I bought these pulleys that were made for grow lights.  I love them because you can easily raise and lower your lights and not have to mess with chain links like I was before.  My husband is a smarty-tarty and color-coded the pulley strings so I knew which set to use.

So top-left shelf are my tomatoes - top-right are my peppers - bottom shelf has everything else.


Close up of my peppers


Look how big my tomatoes look compared to my peppers.  It's pretty amazing how fast everything grows.


What not to do :(

April 24, 2013

Lesson 1 - Don't leave your plants outside if it's going to get below freezing.

I was hardening off my cabbage since you can plant them in the garden so much earlier than the rest of my plants.  I only had a few more days to go until the weather appeared to stay above freezing at night and I left my plants outside all night by mistake.

I left for work and there they were...I couldn't believe I killed my plants.

I will start two more seedlings...I planted these February 28th and killed them April 24th:  that puts me approximately 55 days behind schedule...not sure this is going to work out  :(


Eggplant Update

April 19, 2013

I know, I know, the picture isn't clear.  I really didn't want to set up the giant tripod to take one picture.  The photo focused on the Poblano label instead of the two eggplants in the front of the picture.  As you can see, they are growing pretty fast.
(Before transplant to red Solo cup)


Tomato Transplant Time

April 18, 2013


Look how big my basil and tomatoes got!


First I use my favorite potting soil: Roots Organics


Here are the ingredients:

Coco fiber, peat moss, perlite, pumice, premium worm castings, bat guano, kelp, fish bone meal, soy bean meal, feather meal, greensand, leonardite, and alfalfa meal.


Place some soil in a bowl and add water.  You don't want your soil to become soggy, just not dry.


Place a small amount of soil into the red solo cup (cut five small holes in the bottom for bottom watering) then sprinkle some Mykos.(fro

Information from Mykos' website:   increases plant biomass and yield by up to 300%. Xtreme Gardening® MYKOS (mycorrhizae) is a beneficial soil fungus that facilitates the breaking-down and transporting of nutrients to plant roots.
MYKOS increases the availability of both the moisture and nutrients required for plant growth and connects many of the microbes in healthy soil to host plants. With one application, MYKOS is capable of transforming an ordinary garden into something Xtreme! 


You can see the white Mykos sprinkles


Remember I started my tomatoes in my rapid rooter plug.  Once the roots started coming through the plugs, I put enough potting soil in the grow tray to raise the plugs almost to the surface.  Then I surrounded the plug with more potting soil (see below)


 Place the root plug in the cup.  As you can see, I put some soil on the bottom to give the roots something to stretch out in AND I left room at the top so I can burry the plants deeper than they were originally.

Tomato stem grow roots if buried.  So each time you move them, burry them deeper.


Viola!  Final product.  I will keep my plants in these cups until it's time to take outside.


 Here is what my setup currently looks like.  You can see my tomatoes on the top left.  My peppers and eggplant and some herbs are on the top right.  The bottom shelf has my bok choy, cabbage, and celery.